
In the world of content management, no website is truly the same. Every company with a site, even those in the same line of business, has different priorities, talking points, and target markets. Therefore, it goes without saying that the content on each site requires variation in its schemas and data definitions.
Every professional CMS should provide the ability to add custom fields without a major development effort. In WordPress, you can add custom key-value fields to your posts without much effort. Sitefinity allows custom fields with more type definitions than WordPress.
To use those custom fields on your site, however, requires editing the theme’s PHP code in WordPress or the C# code in Sitefinity widget templates.
I want to talk about how we do it here at Marketpath. I truly believe our custom fields methodology allows the least amount of friction between marketers and developers, the greatest flexibility, and can even be utilized by technical marketers. You’ll see what I mean after a few examples.
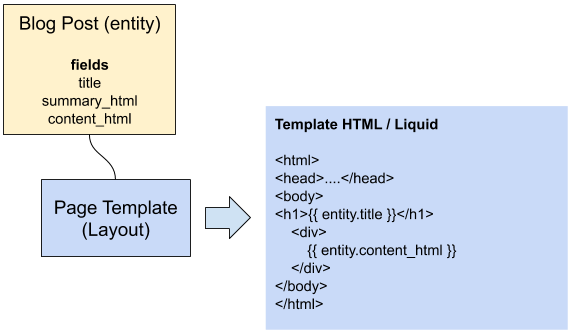
A Marketpath CMS page, which represents a unique URL on your live site, is comprised of an entity and a page template (see fig. 1). The entity contains the actual content while the template contains the markup and logic that formats and displays the content. Entities are the predefined objects in Marketpath CMS, like articles, blog posts, calendar entries, and tags.
When you check Has URL in the entity properties dialog for any type (see fig. 2), you can set your domain and path, and then choose the appropriate page template for the layout you want.

Page templates have HTML, CSS, Javascript, and Liquid code. The Liquid code is what actually queries and returns object data. We’re not going to get into querying data in this post. Instead, I’m showing you the relative ease of adding and utilizing custom fields.
The first thing to know is that every object has predefined fields already. An article has a title, a summary, the main content, and other fields. To access the title, all I have to do is write the following code:
{{ entity.title }}
In this case, entity refers to the parent object to which the current URL belongs. It’s a generic abstract class for all entities (i.e. articles, blog posts, calendar entries, etc.).
Now, let’s add a text field to a template called Subtitle (see fig. 3). There are a lot of options here, such as making it required, setting a default value, adding validators, and even adding conditionals causing it to show or hide based on the values of other fields. I’m not going to set any of those for this example.
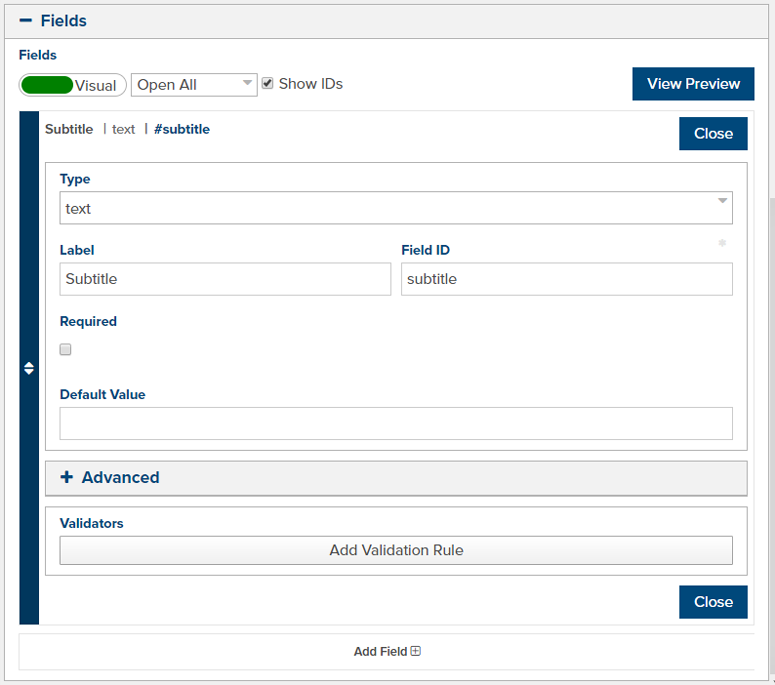
Every page that utilizes this template will now see the custom field appear in the entity’s properties dialog (see fig. 4). Custom fields will appear just below all predefined fields.

Accessing this new field in the template code will look like this:
{{ entity.subtitle }}
If I provide a default value for the field then every other entity that uses the template will automatically inherit that default value until it is changed.
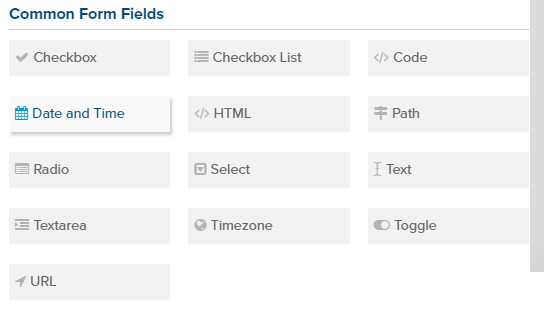
There is a whole list of simple custom field types you can add to your template (see fig. 5).
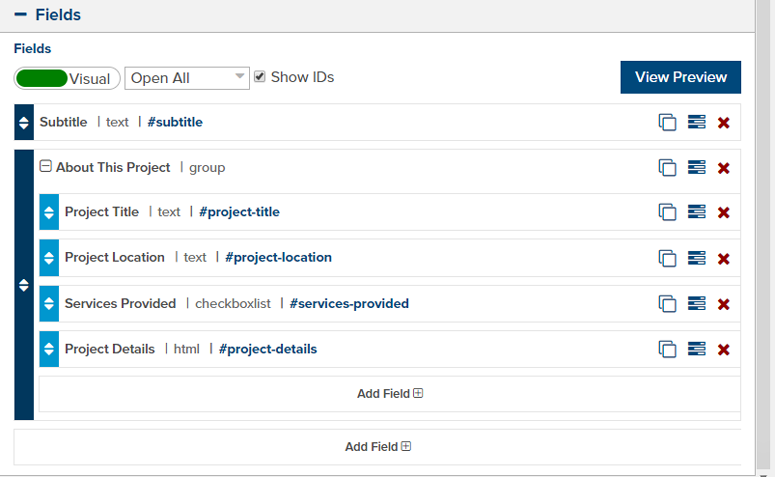
In Marketpath CMS, custom fields can be grouped together to help clarify their intent and make editing more intuitive. In the example below, I’m showing the field definitions in the template (see fig. 6) and then the view for editors when adding and updating content (see fig. 7). Since, I’ve extended the default article object with these fields any article using this template will be able to set values for these fields. I could then pull those specific articles into a new project repository listing in various ways.
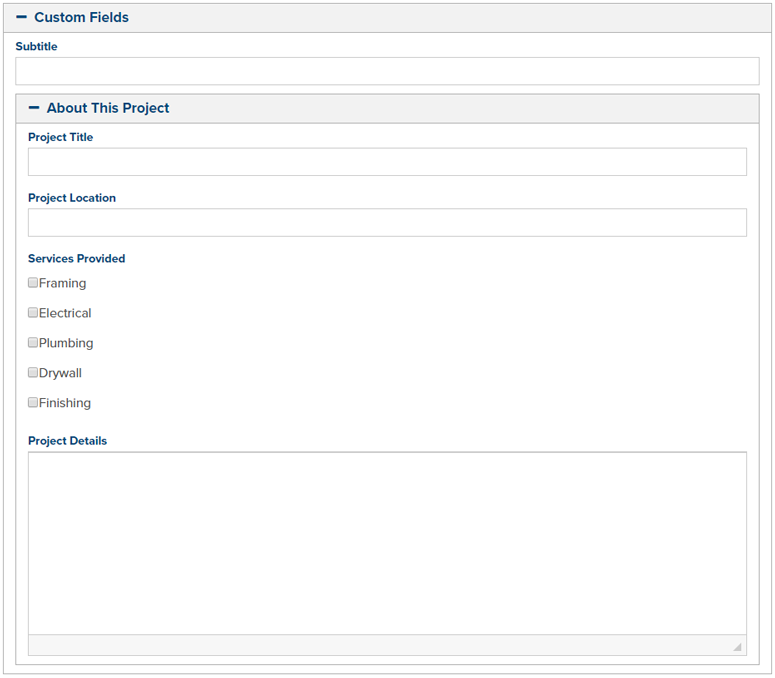
Another custom field type is for referencing the built-in object types in Marketpath CMS. I can require the editor to select an article, blog post, calendar entry, document, image, datastore item, folder, tag, form, template, and more (see fig. 8).
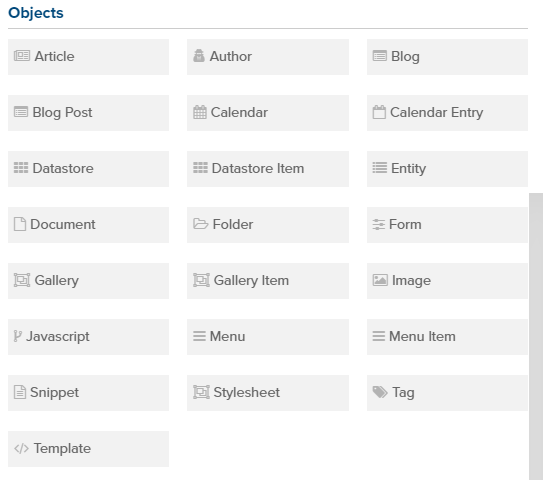
Let’s say I want the editor to select a proper call-to-action for each page using this template. In Marketpath CMS, calls-to-action are often Snippets, but they can be stored as articles or really any item you want them to be. How you extend objects and use them is entirely up to you.
In this example, the editor will select a call-to-action from your list of snippets. First, they will click on the Select button (see fig. 9). Then, they will choose from the current list of snippets (see fig. 10), or they could create a new one, if desired.


To assist the editor even further I can change my template custom field to utilize filters. This means, when the editor selects a snippet I can have it only show snippets filtered by a specific tag or folder. If the custom field was an article or blog post, there are even more choices to filter by, such as, whether or not the object has a page (URL), specific authors, or even the start and end dates of the article’s post date.
Accessing this new object in the template code will look like this:
{{ entity.call-to-action.content_html }}
Or, if the field is optional, you could test for a valid value first before displaying the field.
{% if entity.call-to-action.is_valid %}
<div class=”call-to-action”>
    {{ entity.call-to-action.content_html }}
</div>
{% endif %}
The idea here is to simplify the job of the content editors and maintain the integrity and format of the site content. Editors should not have to consider or deal with formatting, other than heading tags, bold, italic, etc.
The final custom field type takes the form of lists. Continuing the project page example I used above, I could easily setup the page so editors could add a list of related projects. In this case, I’ll choose Article List from the list below (see fig. 11).
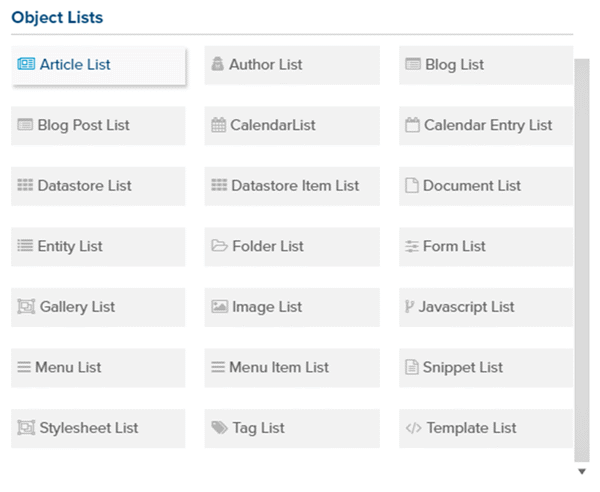
With the addition of that field, an editor can now add one or more articles to the list. I can even filter the list of selectable articles to only those having a Projects tag (see fig. 12). That way it won’t show every single article in the system.
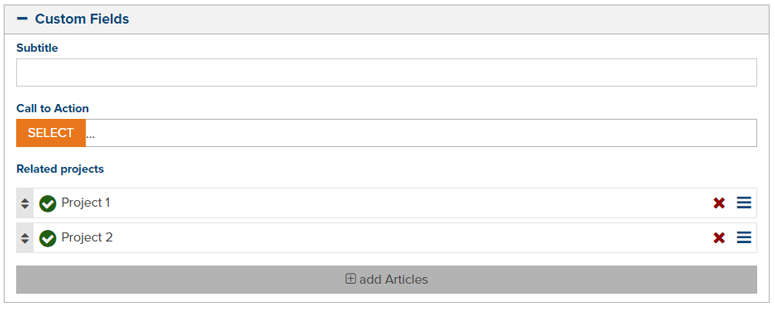
The great thing about object lists is that they are manually sortable by the editor. This allows for prioritizing certain items (projects in this case) over others. As a developer, you can take this one step further by not requiring any related projects and loading them automatically if none were selected. Or, if only one project was selected you could auto load 2 more.
Marketpath CMS also allows you to build your own custom objects and store them in a datastore. The datastore defines the fields of the custom object very similar to how a template defines the fields available for editing pages. And since each datastore and it’s items are entities, they can each have a page or URL just like articles and blog posts.
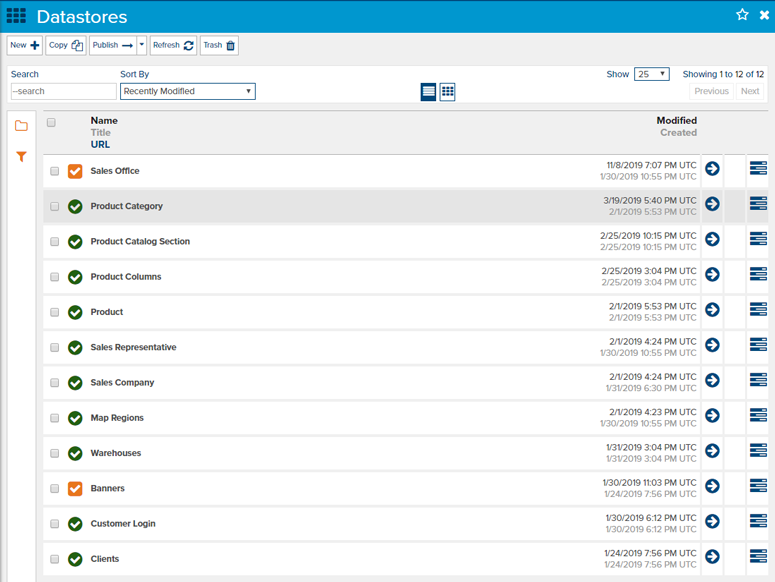
Datastores provide a tremendous boost to Marketpath CMS content capabilities. Here’s an example (see fig. 13) of a complex set of datastores that refer to each other, creating a type of relational database without all the complexities of maintaining a true relational database.
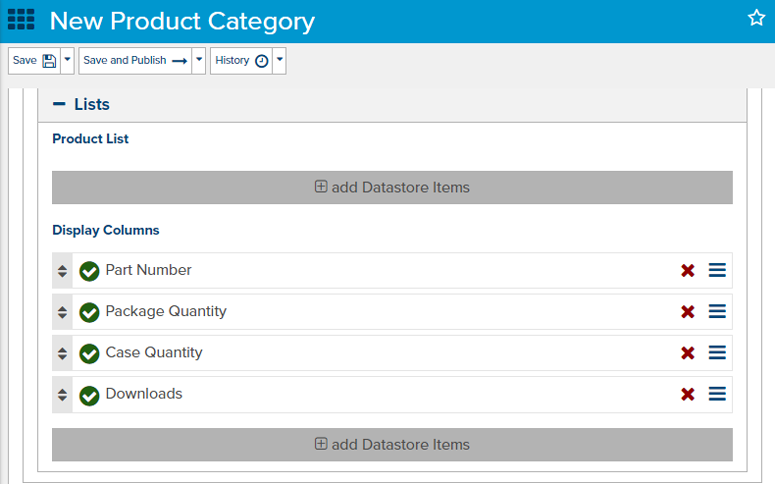
From an editor’s standpoint, they fill in the appropriate fields and select related objects from other datastores just as if they were editing page (see fig. 14).
The sky's the limit with how a site is built which gives both developers and marketers tremendous flexibility in accomplishing their goals. With Marketpath CMS, you have 100% control over the rendered output and complete control over how you organize and maintain your site’s content.
Dynamic custom fields in a content management system are a necessity. But don’t settle for flat, key-value text fields when you can build an object hierarchy that represents the unique characteristics of your site or client sites. And giving editors easier, more intuitive control over managing those sites doesn’t hurt either.
Marketpath CMS gives you the freedom to play around to your heart’s content without incurring any fees. We won’t even ask for a credit card. And even with your dev site we will provide free, unlimited support while you master the platform.